In the complex ecosystem of PC cooling, enthusiasts often obsess over massive dual-tower heatsinks, high-static-pressure fans, and intricate custom liquid cooling loops. Yet, the entire efficiency of a multi-hundred-dollar cooling apparatus hinges entirely on a layer of gray compound no thicker than a sheet of paper. This is the Thermal Interface Material (TIM), commonly known as thermal paste.
Applying thermal paste is the most heavily debated, mythologized, and misunderstood process in PC building. Forums are filled with endless arguments over which application method yields the lowest temperatures. However, optimizing thermal transfer requires moving beyond internet lore and understanding the actual physics of heat dissipation, mounting pressure, and silicon die layouts.
This comprehensive guide dissects the microscopic physics of thermal interfaces, evaluates the efficacy of the Dot, Line, X-shape, and Manual Spread application techniques, and explains the critical differences between pasting a CPU and a bare-die GPU.
1. The Physics of the Thermal Interface
To understand why thermal paste is necessary and how to apply it correctly, you must understand the microscopic reality of computer hardware.
To the naked eye, the silver metal lid on top of your CPU (the Integrated Heat Spreader, or IHS) and the copper cold plate of your cooler appear perfectly flat and polished. However, under a microscope, these metal surfaces are incredibly rugged. They are covered in microscopic peaks, valleys, grooves, and manufacturing striations.
- The Problem with Air: When you clamp a metal cooler directly onto a metal CPU, the microscopic peaks touch, but the valleys create thousands of microscopic air pockets. Air is a phenomenal thermal insulator; it actively blocks the transfer of heat. If you run a modern CPU without thermal paste, it will hit its TjMax (thermal throttling limit) and shut down within seconds, even with a massive radiator attached.
- The Role of TIM: Thermal paste is not actually a “cooling” paste. It is a highly conductive compound (usually made of suspended zinc oxide, aluminum oxide, or carbon micro-particles) designed to do exactly one thing: displace the insulating air. It fills in the microscopic valleys, creating a continuous, unbroken bridge for the heat to travel from the CPU into the cooler.
- The “Thinner is Better” Rule: While thermal paste is vastly more conductive than air, it is significantly less conductive than solid copper or aluminum. Therefore, the goal is never to create a thick blanket of paste between the components. The absolute ideal application is the thinnest possible layer that successfully fills the microscopic air gaps while allowing direct metal-to-metal contact on the microscopic peaks.
2. Thermal Paste Viscosity and Conductivity
Not all thermal pastes are created equal. The physical properties of the compound dictate which application method will work best.
- Thermal Conductivity (W/mK): This metric measures how efficiently the paste transfers heat. Standard generic pastes often sit around 4 to 5 W/mK, while high-end enthusiast pastes (like Thermal Grizzly Kryonaut) can reach 12.5 W/mK or higher.
- Viscosity (Thickness): Some pastes, like Noctua NT-H1, have a low viscosity; they are runny and spread effortlessly under the pressure of the heatsink. Others, like Gelid GC-Extreme or older Arctic Silver formulations, are highly viscous and thick, resembling modeling clay. Thick pastes require either manual spreading or extreme mounting pressure to achieve the necessary thin, even layer.
3. The Application Techniques: Analyzing the Methods
Over the decades, PC builders have developed several distinct methods for applying paste. The “correct” method is not universal; it depends heavily on the physical shape of the CPU, the internal layout of the silicon cores, and the viscosity of the paste.
The “Pea” or “Dot” Method
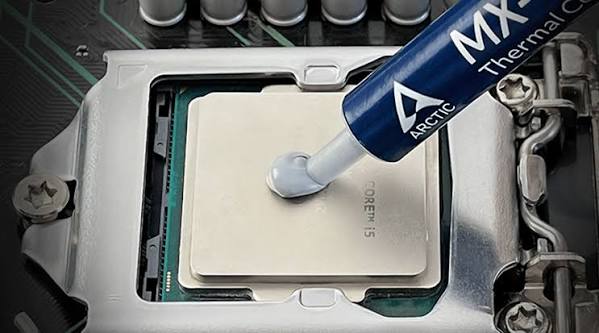
This is the oldest, most common, and generally most recommended method for standard desktop processors. You place a single, perfectly spherical dot of paste (roughly the size of a green pea or a grain of rice) directly in the dead center of the CPU IHS.
- The Mechanism: When the cooler is screwed down, the pressure forces the dot to expand outward in a perfect 360-degree circle.
- The Advantage: This method is mathematically the best way to prevent trapped air bubbles. Because the paste expands outward from a single central point, it pushes all the air out ahead of it.
- The Limitation: It results in a circular spread. Most CPU heat spreaders are square or rectangular. If the dot is too small, the paste will not reach the four corners of the CPU. While the dead center (where the silicon die usually lives) will be cooled, the edges will remain dry.
The “Line” Method
Instead of a dot, you draw a single, thin vertical or horizontal line of paste across the center of the CPU.
- The Mechanism: When compressed, the line squishes outward into a large rectangular or oval shape, pushing air out to the sides.
- Optimal Use Cases: The line method is highly effective for modern Multi-Chip Module (MCM) architectures, such as AMD’s Ryzen processors. Instead of one central square of silicon, Ryzen CPUs have multiple small “chiplets” arranged in a vertical column under the heat spreader. Applying a vertical line of paste guarantees that the compound directly covers the hottest internal components, even if it doesn’t reach the extreme outer corners of the IHS.
The “X” or “Cross” Method
You draw two intersecting lines of paste diagonally from corner to corner, forming an “X”. Often, builders will add four tiny dots in the remaining empty triangles.
- The Mechanism: The immense pressure of the cooler forces the intersecting lines to expand, providing massive surface area coverage.
- Optimal Use Cases: This method is virtually mandatory for HEDT (High-End Desktop) and server processors, such as AMD Threadripper or Intel Xeon chips. These processors are massive, rectangular slabs of metal. A standard pea-sized dot would cover less than 30% of their surface area. The X-method ensures that the paste reaches the far corners of these gigantic heat spreaders. It is also increasingly recommended for Intel’s elongated LGA 1700 CPUs (12th, 13th, and 14th generation Cores).
The “Manual Spread” (Spatula) Method
Instead of relying on the pressure of the heatsink, you squeeze a blob of paste onto the CPU and use a small plastic spatula (or a credit card) to manually frost the entire CPU like a cake, ensuring 100% edge-to-edge coverage before installing the cooler.
- The Advantage: It guarantees absolute, total coverage of the heat spreader without relying on the guessing game of mounting pressure.
- The Limitation: It introduces a high risk of trapping air bubbles. If your manual layer is uneven, or has tiny peaks and valleys from the spatula, air pockets will become trapped between the paste and the flat cooler cold plate when it is lowered down.
4. CPU (IHS) vs. GPU (Bare Die) Application
The most critical distinction in thermal paste application is understanding the difference between a processor with a lid and a processor without one.
Desktop CPUs feature an Integrated Heat Spreader (the silver lid). The actual fragile silicon die is hidden safely underneath this lid. If your thermal paste application only covers 80% of the IHS, it is generally fine. The copper lid acts as a thermal buffer, absorbing the heat from the silicon and moving it to wherever the paste is located.
Graphics Cards (GPUs) and Laptop CPUs are Bare Die. There is no metal lid. The shiny, fragile silicon chip is exposed directly to the cooler.
- The Bare Die Rule: You MUST use the Manual Spread method on a bare die. If you use a pea-sized dot on a GPU, and the paste only covers 95% of the silicon, that remaining 5% of dry silicon will overheat almost instantly. Without a metal IHS to buffer the heat, that dry corner will trigger severe localized thermal throttling (a massive GPU Hotspot temperature spike) or physically burn out the transistor gates. Edge-to-edge coverage is mandatory for GPUs.
5. Mounting Pressure: The Invisible Variable
The endless internet debates over “Dot vs. Spread” completely ignore the most important variable in the equation: Mounting Pressure.
If you use a massive, heavy dot of paste, but you tighten your CPU cooler down with massive torque, the pressure will squeeze all the excess paste out over the edges of the CPU, leaving a perfectly thin layer behind. Conversely, if you use a perfect manual spread, but fail to tighten the cooler screws enough, the paste will remain thick and act as an insulator.
Best Practices for Mounting:
- The Cross Pattern: Never tighten one screw all the way down and then move to the next. This acts like a seesaw, tilting the cooler, squishing all the paste out one side, and lifting the other side off the CPU completely.
- Iterative Tightening: Give the top-left screw two turns. Then the bottom-right screw two turns. Then top-right, then bottom-left. Repeat this cross-pattern until all screws hit their strict mechanical stopping point. This guarantees the cooler lowers perfectly flat, squishing the paste evenly in all directions.
6. The “Pump-Out” Effect and Degradation
Thermal paste is not a permanent solution. Over time, it undergoes severe physical degradation requiring maintenance.
- Thermal Cycling: When you turn your PC on and start a heavy render, the CPU and the cooler both heat up and physically expand. When you shut the PC down, they cool and contract.
- The Pump-Out Effect: This constant, daily microscopic expansion and contraction literally “pumps” the thermal paste out from between the two metal surfaces over time.
- Drying Out: Simultaneously, the intense heat causes the liquid suspending agents in the paste to evaporate. The paste turns from a viscous fluid into a hard, chalky, cracked powder.
- The Maintenance Cycle: Once the paste pumps out or dries up (usually every 2 to 4 years, depending on workloads and paste quality), system temperatures will suddenly begin spiking by 10°C to 15°C under load. The cooler must be removed, the chalky residue cleaned off with 99% isopropyl alcohol, and fresh paste applied.
7. A Note on Liquid Metal
For extreme enthusiasts seeking the absolute lowest temperatures, standard ceramic/carbon thermal pastes are abandoned in favor of Liquid Metal (such as Thermal Grizzly Conductonaut).
Liquid metal is exactly what it sounds like: a gallium-based alloy that remains liquid at room temperature. It boasts a thermal conductivity of 73 W/mK—nearly ten times higher than standard paste.
However, liquid metal is highly dangerous for inexperienced builders. It is electrically conductive. If you squeeze out too much, and a single micro-drop rolls off the CPU and touches a capacitor on the motherboard, it will instantly short-circuit and permanently destroy the motherboard and CPU. Furthermore, gallium chemically reacts with aluminum, meaning it will dissolve and destroy any cooler that does not have a pure copper or nickel-plated cold plate. It should only be applied manually, using a micro-swab to paint a microscopic layer onto the die, and is generally reserved for advanced bare-die laptop repasting or custom delidded CPUs.