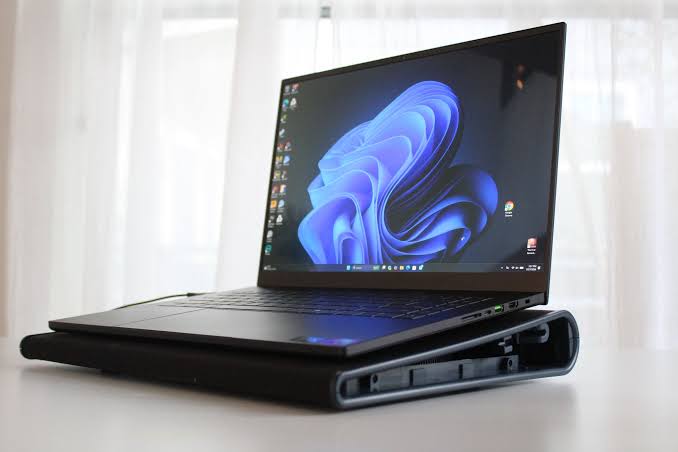
While desktop PC builders have the luxury of solving thermal issues by throwing massive dual-tower heatsinks and high-airflow chassis at the problem, laptop engineers are engaged in a brutal war against physics. Modern high-performance gaming and workstation laptops cram 150-watt GPUs and 100-watt CPUs into a chassis no thicker than a textbook.
The thermal architecture of a laptop is an exercise in extreme compromise. When these cooling systems degrade, the consequences are immediate and severe: blistering keyboard temperatures, deafening blower fan noise, and aggressive thermal throttling that cuts performance in half.
Restoring a laptop to its factory thermal performance—or pushing it beyond—requires opening the chassis and servicing the Thermal Interface Material (TIM). However, repasting a laptop is vastly more complicated, and significantly more dangerous, than repasting a desktop CPU. This comprehensive guide dissects the unique architecture of mobile cooling, explains the devastating “Pump-Out” effect, and explores why modern enthusiasts are abandoning traditional thermal paste in favor of Phase-Change Materials (PCMs) and viscous thermal putties.
1. The Mobile Thermal Architecture: Shared Heat and Bare Silicon
To understand why laptops overheat so quickly, you must examine the internal hardware under the bottom panel.
- Shared Heat Pipe Assemblies: In a desktop, the CPU and GPU have completely independent cooling systems. In most laptops, copper heat pipes run across both the CPU and the GPU, routing heat to shared radiators at the rear corners of the chassis. This means if you are playing a heavily GPU-bound game, the immense heat from the graphics card will travel down the copper pipes and actively heat up the CPU, even if the processor is mostly idle.
- The Bare Die Reality: Desktop CPUs are protected by a thick metal Integrated Heat Spreader (IHS). Laptops have no such luxury. When you remove a laptop heatsink, you are staring directly at the bare, fragile, mirror-like silicon dies of the CPU and GPU.
- Extreme Density: Laptops rely on dense, microscopic copper fin stacks and high-RPM “blower” style centrifugal fans. Because the fins are incredibly close together, even a microscopic layer of household dust will instantly form a solid wall of felt, completely blocking airflow and suffocating the machine.
2. The Enemy of Mobile Cooling: The “Pump-Out” Effect
Many users notice their laptop runs perfectly cool for the first six months, only for temperatures to suddenly skyrocket to 95°C+ a year later. They open the laptop, expecting to find dust, but the fans are completely clean. The culprit in this scenario is almost always the Pump-Out Effect.
Laptops undergo extreme thermal cycling. You turn it on, play a game, and the bare silicon hits 90°C and physically expands. You turn the game off, and it rapidly cools and contracts. Because there is no metal IHS to buffer the heat, the extreme, localized thermal expansion and contraction of the bare silicon acts like a microscopic hydraulic press. Over thousands of cycles, it literally “pumps” the liquid thermal paste out from between the die and the heatsink.
If you open an overheating laptop, you will often find the center of the silicon die is completely dry and burnt-looking, with a massive ridge of excess thermal paste pushed completely off the chip and onto the green PCB surrounding it.
3. Choosing the Right TIM: Why Standard Paste Fails
The most common mistake amateur technicians make is using the same thermal paste on their laptop that they use on their desktop.
Enthusiast desktop pastes (like Arctic MX-4, Noctua NT-H1, or standard Thermal Grizzly Kryonaut) are engineered for desktop CPUs with metal lids. They are low-viscosity (runny) to allow for easy spreading. Do not use these on a laptop. If you use a runny, thin paste on a bare laptop die, the extreme thermal cycling will pump it out completely within 3 to 6 weeks, forcing you to disassemble the laptop all over again.
High-Viscosity Pastes (The Traditional Solution)
For laptops, you must use a highly viscous, thick, “clay-like” thermal paste that resists the physical forces of pump-out.
- Top Recommendations: Gelid GC-Extreme, SYY-157, Thermalright TFX, or Phobya NanoGrease Extreme.
- Application Rule: Because it is a bare die, you must use the manual spread method. Use a tiny plastic spatula to frost the entire silicon die edge-to-edge. If you use a “pea dot” and the heatsink pressure leaves one corner of the die dry, that specific corner will hit 110°C instantly and crash the system.
Phase-Change Materials (The Modern Ultimate Solution)
In the last few years, the enthusiast laptop community has largely abandoned traditional liquid thermal paste in favor of industrial Phase-Change Materials (PCM), specifically Honeywell PTM7950.
- How it Works: PTM7950 comes as a solid, ultra-thin grey thermal pad. You cut it to the exact size of the silicon die and place it on top. When you boot the laptop and the CPU hits 45°C, the pad physically undergoes a phase change, melting into a highly conductive liquid paste. When you turn the laptop off, it solidifies back into a pad.
- The Advantage: Because it solidifies at room temperature, it is physically immune to the pump-out effect. It will last the entire operational lifespan of the laptop without ever degrading. Furthermore, its thermal conductivity matches or beats the most expensive enthusiast liquid pastes. It is currently the undisputed king of laptop repasting.
Liquid Metal (High Risk, High Reward)
Many modern flagship laptops (like the ASUS ROG series) now come from the factory with Gallium-based Liquid Metal instead of thermal paste. It offers the absolute best thermal transfer known to physics.
- The Danger: Liquid metal is highly electrically conductive. If you apply it yourself and a single micro-drop spills off the die onto the tiny SMD capacitors surrounding the chip, it will instantly short-circuit and permanently destroy the motherboard.
- Precautions: Applying liquid metal requires painting a microscopic layer onto the die, coating the surrounding capacitors in a protective conformal coating (like clear nail polish or specialized electrical lacquer), and creating a physical foam/sponge barrier around the die to prevent the liquid metal from escaping if the laptop is jostled in a backpack. Do not attempt this unless you are highly experienced.
4. Thermal Pads vs. Thermal Putty (Cooling the VRMs and VRAM)
Surrounding the main CPU and GPU dies are several secondary components that also require cooling: the VRAM (Video RAM) chips and the VRM (Voltage Regulator Module) chokes. These are traditionally cooled using squishy silicone thermal pads to bridge the gap between the chips and the overarching copper heatsink.
The Thickness Trap
Replacing factory thermal pads on a laptop is a notoriously dangerous trap. Unlike desktops, laptop heatsink tolerances are machined to the fraction of a millimeter.
- If a laptop requires a 1.0mm pad on the VRAM, and you install a 1.5mm pad, the extra thickness will prop the entire copper heatsink up in the air.
- This prevents the heatsink from physically touching the GPU core die. You will boot the laptop, the GPU will instantly hit 105°C, and the system will shut down. Finding the exact, mathematically perfect pad thicknesses for every specific component on your exact laptop model is incredibly difficult.
The Solution: Viscous Thermal Putty
To bypass the “thickness trap” entirely, laptop enthusiasts use Thermal Putty (such as K5 Pro, Upsiren U6 Pro, or Laird Tputty).
- Thermal putty is a thick, highly conductive, non-electrical paste with the consistency of play-dough.
- Instead of guessing pad thicknesses, you roll a small ball of putty and place it on top of every VRAM chip and VRM choke. When you screw the copper heatsink down, the heatsink squishes the putty perfectly to the exact custom thickness required for every individual chip, guaranteeing zero interference with the main CPU/GPU mounting pressure.
5. The Repasting Protocol: Strict Safety Rules
Opening a laptop and exposing the bare silicon requires strict adherence to safety protocols to prevent destroying the machine.
- Disconnect the Battery (Absolute Rule #1): The instant you remove the bottom plastic cover of the laptop, the very first thing you must do is unplug the main battery cable from the motherboard. Dropping a tiny metal screw onto a motherboard that still has battery power will instantly cause a short circuit and kill the board.
- Discharge Residual Power: After unplugging the battery, open the laptop lid and hold the power button down for 10 seconds to drain all leftover electricity from the capacitors.
- Loosening the Heatsink (The Reverse Cross Pattern): Laptop heatsinks are secured with tiny, fragile, spring-loaded screws numbered 1 through 6 (or 8). When removing the heatsink, loosen them in reverse numerical order, half a turn at a time. This prevents the stiff copper pipes from flexing and cracking the fragile silicon die underneath.
- Cleaning the Bare Die: Never scrape the old paste off with metal or hard plastic. Use a cotton swab soaked in 99% Isopropyl Alcohol to dissolve the old paste. Wipe it clean with a microfiber cloth until the silicon is a spotless, perfect mirror.
- Tightening the Heatsink (The Forward Cross Pattern): When reinstalling, follow the numbers printed on the heatsink (1, 2, 3…). Turn screw #1 one full turn, then screw #2 one full turn, alternating until they hit their natural mechanical stop. Do not over-torque them, or you will crush the die.
- Reconnect the Battery Last: Only plug the battery back in when the heatsink is fully secured and you are ready to put the plastic bottom cover back on.