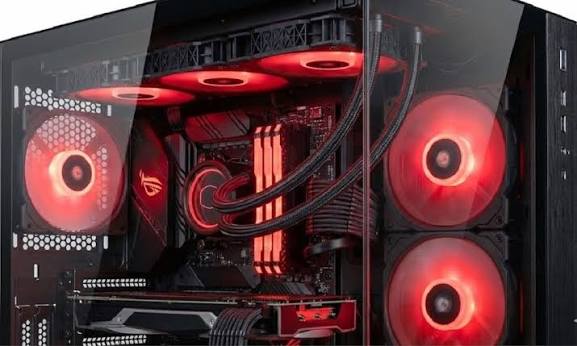
In the realm of high-performance computing, enthusiasts spend immense amounts of time and money selecting the perfect dual-tower CPU coolers and massive, triple-fan graphics cards. However, these expensive cooling solutions share a fundamental physical limitation: they cannot destroy heat. They merely transfer heat from the silicon into the surrounding air. If the ambient air inside the PC case is stagnant, the components will simply recirculate their own exhaust, leading to a rapid and inevitable thermal collapse.
The ultimate responsibility for system cooling lies with the chassis itself and the configuration of its case fans. A properly engineered airflow configuration ensures a constant, directed supply of cold ambient air into the system and an immediate evacuation of the heated exhaust.
This comprehensive guide breaks down the fluid dynamics of PC cooling, explores the critical distinction between positive, negative, and neutral pressure configurations, explains how to mitigate dust accumulation, and provides a blueprint for eliminating thermal dead zones inside your chassis.
1. The Physics of Case Airflow: Forced Convection
In thermodynamics, natural convection dictates that hot air rises and cold air sinks. While this principle is true, relying on natural convection to cool a modern PC drawing 500+ watts of power is completely unviable. The thermal energy is generated far too rapidly. Therefore, PCs rely on Forced Convection—using mechanical fans to artificially overpower natural thermodynamics and forcefully direct air along specific pathways.
To achieve efficient forced convection, an airflow layout must possess two properties:
- High Volume (CFM): Measured in Cubic Feet per Minute, this dictates how much raw air is being moved through the chassis.
- Directional Velocity: Air must move in a clean, unobstructed path. If fans blow in opposing directions, they create turbulent “dead zones” where air violently swirls in place rather than exiting the case.
How you arrange your intake (pushing air in) and exhaust (pulling air out) fans creates a specific internal air pressure state relative to the room outside. This pressure state is the defining characteristic of your cooling architecture.
2. Negative Air Pressure: The Exhaust-Driven Approach
A PC case operates in a state of Negative Air Pressure when the exhaust fans are pulling more air out of the case than the intake fans are pushing in.
- How it Works: Imagine a case with three 120mm fans acting as exhausts (two on top, one on the rear) and only one 120mm fan acting as an intake on the front. The exhaust fans are attempting to evacuate a massive volume of air, creating a slight vacuum inside the chassis.
- The Thermal Advantage: Negative pressure is phenomenally effective at raw heat extraction. Because the system is desperate to equalize the vacuum, hot air is violently sucked out of the system as fast as the components can generate it. For massive graphics cards that dump non-directional heat straight into the chassis, negative pressure ensures that heat doesn’t linger.
- The Catastrophic Disadvantage (Dust): Nature abhors a vacuum. Because the internal pressure is lower than the room pressure, the case will aggressively suck air in through every single unfiltered crack, gap, and seam in the metal chassis to equalize the pressure. Air will pull in through the PCIe slot covers, the USB port gaps, and the seams of the glass panel. Within months, the interior of a negative pressure system will be completely coated in a thick, insulating layer of dust, eventually choking the heatsinks and causing severe overheating.
- Verdict: Negative pressure yields excellent raw temperatures in a sterile laboratory environment, but it is an absolute maintenance nightmare for a standard home or office PC.
3. Positive Air Pressure: The Overpressure Shield
A PC case operates in a state of Positive Air Pressure when the intake fans are forcing more air into the case than the exhaust fans can pull out.
- How it Works: Imagine a case with three 120mm intake fans on the front panel, and only one 120mm exhaust fan on the rear. The intakes are forcing massive amounts of air into the confined space, increasing the internal pressure relative to the room.
- The Dust Defense Advantage: This is the primary reason the PC building industry favors positive pressure. Because the internal pressure is high, air is constantly bleeding out of every unfiltered crack and seam in the chassis. If air is constantly pushing out of the PCIe slots, dust physically cannot enter through them. As long as your intake fans are covered by high-quality mesh dust filters, the interior of your PC will remain virtually dust-free for years.
- The Thermal Disadvantage (Stagnation): If the positive pressure is too extreme (e.g., four intakes and zero exhausts), the hot air struggles to leave the case fast enough. The incoming cold air collides with the trapped hot air, creating turbulence. The graphics card ends up recirculating its own exhaust, raising overall system temperatures.
- Verdict: Positive pressure is the standard recommendation for 95% of PC builds. It drastically reduces maintenance requirements and hardware degradation from dust, provided you still maintain adequate exhaust pathways.
4. Neutral Air Pressure: The Theoretical Ideal
Neutral pressure occurs when the exact same volume of air is being pushed in as is being pulled out. (e.g., two 120mm intakes and two 120mm exhausts, all spinning at identical RPMs).
- The Reality: True neutral pressure is a myth in practical PC building. Dust filters restrict intake airflow, radiators choke exhaust airflow, and physical obstructions (like massive GPUs and cable management) alter flow rates.
- The Goal (Slightly Positive): The optimal, realistic goal is a “Slightly Positive” pressure state. You want highly filtered intake fans dominating the flow, paired with just enough active exhaust to ensure the hot air doesn’t pool at the top of the case.
5. Establishing Clean Airflow Pathways
Even with the correct pressure, if the air moves in chaotic directions, the cooling will fail. You must establish a clear, unobstructed “wind tunnel” through the chassis.
The Standard Pathway (Front-to-Back, Bottom-to-Top)
This is the universally accepted layout for standard ATX tower cases:
- Front Panel: Intake fans pulling cold ambient air into the case, directly aimed at the CPU cooler and the GPU.
- Bottom Panel (if available): Intake fans pulling cold air from under the case directly into the exposed fans of the graphics card.
- Rear Panel: A single exhaust fan pulling the hot air coming off the CPU cooler directly out of the case.
- Top Panel: Exhaust fans pulling the rising hot air out through the roof.
Avoiding Turbulence and “Short-Circuiting”
Turbulence occurs when fans fight each other. You must avoid the following common build errors:
- The Top-Front Exhaust Error: If you mount an exhaust fan on the top panel, located at the very front of the case (closest to the front intakes), you will create a thermal short-circuit. The front intake fan pulls cold air in, and the top-front exhaust fan instantly sucks that cold air right back out of the case before it ever reaches the CPU or GPU. Only mount top exhaust fans toward the rear of the case, directly above the CPU.
- Conflicting CPU Cooler Orientation: If you have a tower air cooler on your CPU, its fans must blow in the exact same direction as your case’s front-to-back airflow path. If the case fans blow front-to-back, but the CPU cooler is mounted sideways blowing top-to-bottom, the airflows collide violently, creating a thermal dead zone that cooks the processor.
6. Fan Selection: Airflow vs. Static Pressure
Not all 120mm fans are built the same. The aerodynamic design of the fan blades dictates how the fan interacts with physical obstacles. Using the wrong fan in the wrong location will cripple your airflow regardless of your pressure setup.
Airflow Fans (AF)
- Blade Design: They feature many steep, thin blades designed to scoop and throw the maximum volume of air (CFM) possible.
- The Weakness: They have terrible “Static Pressure,” meaning they have no pushing power. If you put an obstacle in front of an Airflow fan, the air simply bounces back off the obstacle.
- Optimal Use Case: Unobstructed rear or top exhaust slots where there are no restrictive dust filters or radiators in the way.
Static Pressure Fans (SP)
- Blade Design: They feature fewer, wider, flatter blades with very little space between them. They are designed to act like a bulldozer, generating high pressure to force air through tight restrictions.
- The Weakness: They generally move a lower raw volume of air (lower CFM) than Airflow fans when unrestricted, and they can be slightly louder.
- Optimal Use Case: Everywhere there is a restriction. Static Pressure fans must be used on the front intake panel (pushing air through dust filters and dense front mesh), on CPU air cooling towers (pushing air through aluminum fins), and on AIO Liquid Cooling radiators.
7. Diagnosing and Fixing Airflow Issues (The Optimization Checklist)
If your CPU or GPU is thermal throttling, but you have applied fresh thermal paste and mounted the coolers correctly, your case airflow is likely at fault. Follow this optimization checklist:
- The “Panel Off” Test: While running a heavy gaming load, monitor your GPU and CPU temperatures. Take the side glass panel completely off the case. Wait 10 minutes. If your temperatures drop by more than 5°C, your case airflow is severely suffocating your components. If temperatures remain the same (or get worse), your case airflow is already optimized.
- Verify Fan Orientations: It is incredibly common for novice builders to install fans backward. As a universal rule, the side of the fan with the structural plastic cross-braces (the “ugly” side with the specification sticker) is the side the air blows OUT of. Ensure the front fans are pulling air in, and the rear/top fans are pushing air out.
- Adjust the Fan Curve for Pressure: If you want to achieve Positive Pressure without physically buying more fans, use software (like Fan Control or your motherboard BIOS). Set your front intake fans to run 15% to 20% faster than your exhaust fans at all temperature thresholds. This mathematically forces a positive pressure state using RPMs rather than hardware volume.
- Clear the Runway: Thick, braided ATX power cables bunched up directly in front of an intake fan will shatter the directional airflow. Spend the time to route cables behind the motherboard tray to ensure the air has a clean, smooth pathway across the motherboard.
- Remove Obstructive Drive Cages: If your case has metal hard drive cages located directly behind the front intake fans, and you only use modern NVMe M.2 SSDs mounted to the motherboard, unscrew and permanently remove the metal drive cages. They serve only as aerodynamic roadblocks.